
Shopify Theme Customization vs Custom Theme Development: Which Should You Choose?
Should you customize an existing Shopify theme or build a custom one? Compare Theme Editor, Sidekick, apps, design flexibility, costs, and maintenance.
Last updated:
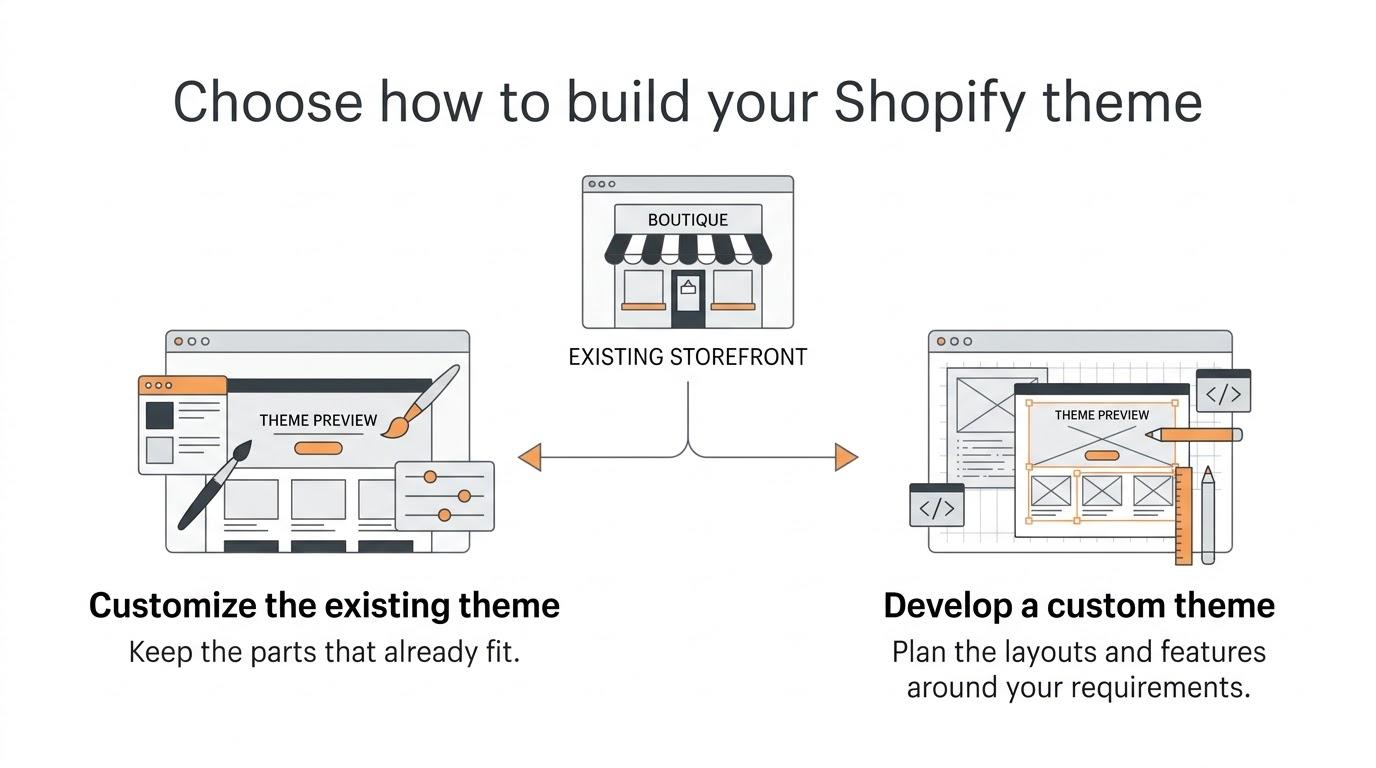
Shopify theme customization means extending an existing theme’s settings, layout, or features. Custom theme development means planning and building the storefront around a broader set of requirements. Start by checking how much of the current theme you can reuse, then compare the work, app dependencies, and maintenance each approach requires.
When you start a Shopify store, you do not need to build everything from scratch. Shopify already provides free and paid themes that come with product pages, collection pages, cart functionality, and sections you can change from the Theme Editor.
For a small store, these themes can be enough. You can change your brand colors, upload images, arrange sections, and add features through Shopify apps. But as your store grows, you may need a design or feature that your existing theme does not support.
This is where you need to decide between customizing your existing Shopify theme and developing a custom Shopify theme. Both approaches can involve code. The main difference is how much of the storefront you need to change and how much control you want over its structure.
What Is Shopify Theme Customization?
Shopify theme customization means making changes to an existing theme. These changes can be related to the user interface (UI), the layout of a page, or the features available on your storefront.
For example, you might want to change the product page layout, move the Add to Cart button, create a different homepage section, or show extra information below the product price. You do not need to rebuild the whole website for these changes.
There are different levels of Shopify theme customization. Some changes can be done by a store owner directly in the Theme Editor, while others need a Shopify developer.
1. Customizing a free or paid theme using the Theme Editor
The simplest way is to start with an existing theme such as Dawn, Horizon, or a paid theme from the Shopify Theme Store.
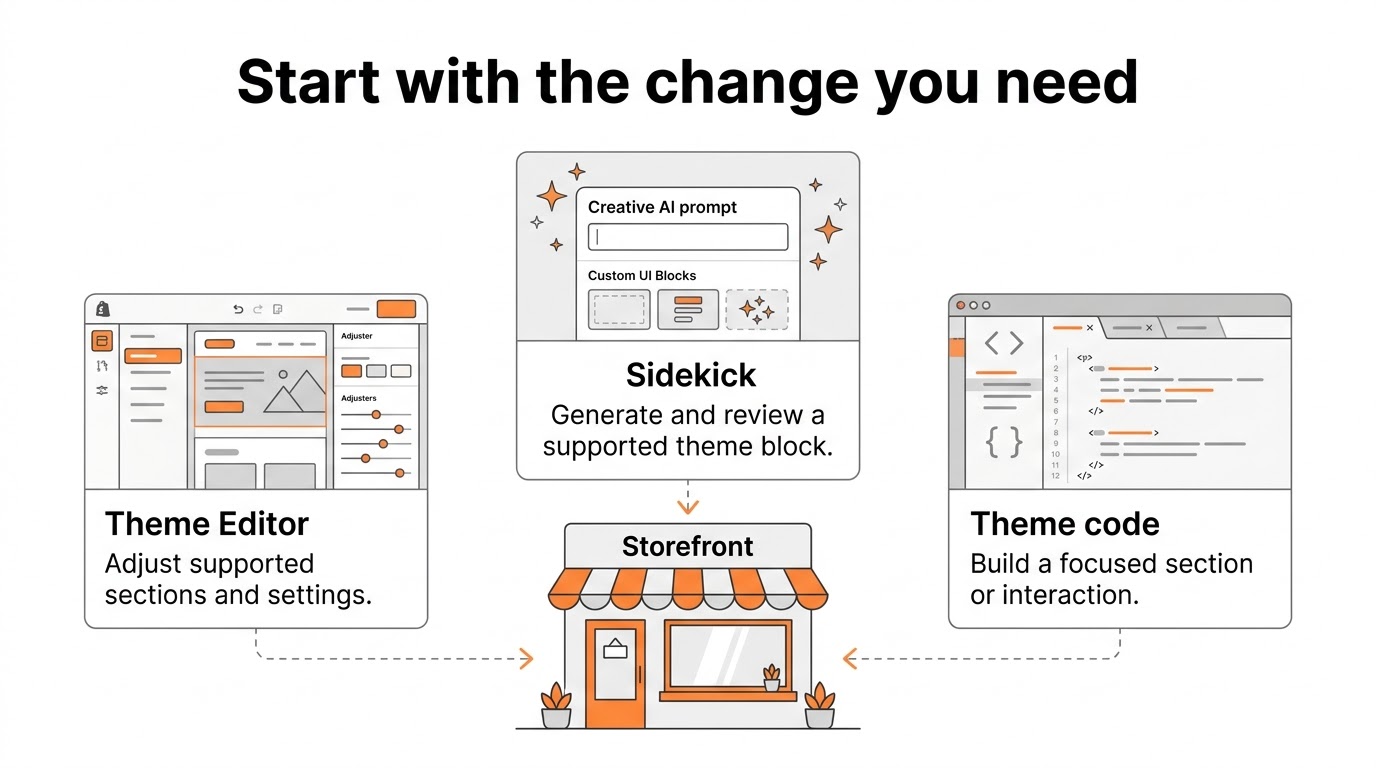
In the Theme Editor, you can change colors, fonts, images, and section settings. You can also add, remove, and rearrange the sections and blocks that the theme supports. A merchant can make these changes without knowing Liquid, HTML, or JavaScript.
Let's say you have a clothing store. You want a homepage banner, a featured collection, a few product benefits, and customer reviews. If your theme already supports these sections, you can set up most of the page using the Theme Editor and a review app.
The limitation is that you work with the layouts and settings provided by your theme. If you want a completely different product gallery, unusual navigation, or a section with specific custom behavior, you might not find an option for it.
Shopify's Theme Editor documentation explains which changes merchants can make without editing code.
2. Using Shopify Sidekick for smaller theme changes
Shopify also provides Sidekick, an AI assistant inside the Shopify admin. Sidekick can help change supported theme settings, work with existing sections, write content, and generate custom theme blocks from a text description.
For example, you can ask Sidekick to create a block with an image on one side, a heading, some text, and a button on the other side. You can then review the result and add it to a compatible section of your theme.
This is useful when you want a small section and do not want to write code yourself. But an AI-generated block is not automatically ready for every store. You still need to check how it looks on mobile, whether the settings work, and whether it affects accessibility or loading speed.
Sidekick should not be treated as a replacement for all custom theme development. It helps with supported tasks, but a complex storefront still needs planning and testing.
There is one newer option worth mentioning: Shopify's Canvas editor, which is in early access for eligible stores. In Canvas, Sidekick can help build or change a theme more broadly from a description. Canvas is separate from the standard Theme Editor, so its workflow and availability are different. It is not something every Shopify merchant can assume they have access to.
See Shopify's documentation for generating theme blocks with Sidekick and Canvas.
3. Customizing an existing theme with Liquid and JavaScript
Theme customization is not limited to the Theme Editor. If your theme does not provide a setting for a feature, a developer can edit the theme code.
Shopify themes use Liquid to render store data, along with HTML, CSS, and JavaScript for the design and interactions. A developer can create a new section, change the product form, add custom variant selectors, or build a cart drawer while keeping most of the original theme.
This is still theme customization because the existing theme remains the base of the website. You are changing selected parts instead of designing and developing the entire storefront again.
For stores that are happy with most of their existing design, this approach is often more practical than starting from zero.
What Is Custom Shopify Theme Development?
Custom Shopify theme development means building a storefront around your business requirements instead of depending mainly on the layout of a ready-made theme.
A custom theme does not always mean every line of code must be written from scratch. Developers can start with an existing codebase such as Dawn or Horizon for a merchant's own store, or use Shopify's Skeleton theme as a minimal starting point.
Dawn and Horizon provide an existing theme structure and components. The Skeleton theme is much more minimal. With Skeleton, developers need to build more of the storefront themselves, which gives them more control but also creates more development work.
Shopify recommends Skeleton for new theme development projects. There is also an important distinction between a custom theme for one merchant and a theme you plan to sell in the Shopify Theme Store: new Theme Store submissions cannot be derived from Dawn or Horizon. Shopify's Theme Store requirements apply to that separate use case.
Custom development can start with a design system
In a custom project, the team can plan the website before starting development. This includes the page layouts, typography, buttons, colors, spacing, and reusable components.
Instead of adjusting a ready-made product page, you can design the product page around how customers actually choose your products. A fashion brand might need detailed size selectors and different product media layouts. A furniture store might need dimensions, material choices, and delivery information that changes between products.
Developers then build these pages using Shopify sections, blocks, Liquid, metafields, metaobjects, CSS, and JavaScript. The goal is to make the storefront work for the business while keeping the content editable from Shopify where possible.
A custom design should not mean that every future change requires a developer. If sections and settings are planned properly, the merchant can still update images, text, collections, and many layouts through Shopify's editor.
Custom features are another reason to choose development
Sometimes the main requirement is not design. Your store might need a custom product configurator, a special cart interaction, or product information that changes based on customer selections.
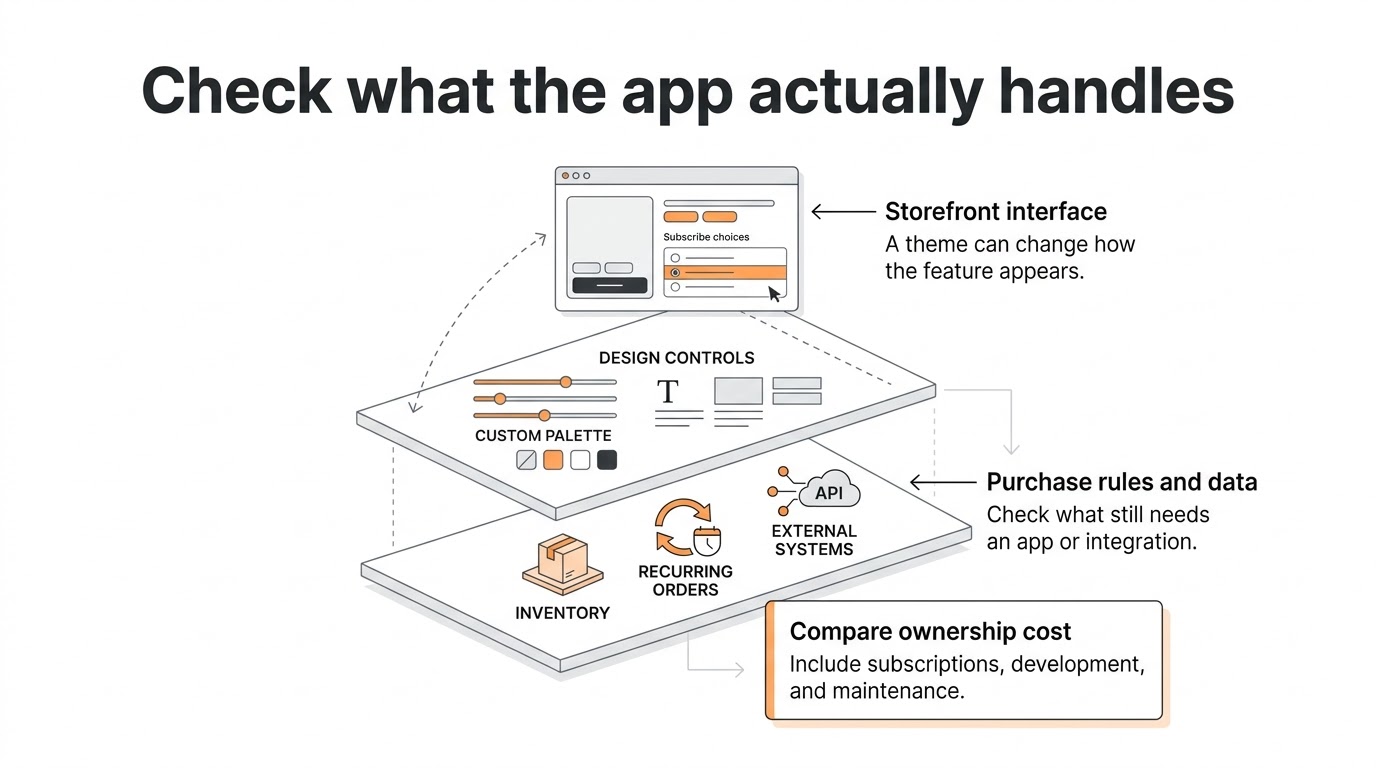
Some of these features can be developed inside the theme. Others need a Shopify app, Shopify Functions, or an external service as well. The theme controls what customers see and interact with, but it does not replace every backend capability.
For example, you can build a custom subscription selector on a product page, but the recurring subscription contracts still need a supported subscription solution. Building the UI alone does not create the subscription system.
This matters when comparing custom development with Shopify apps. A custom theme can replace an app that only adds a simple storefront widget. It cannot automatically replace an app that manages recurring billing, inventory synchronization, or other backend processes.
How to Start a Dawn Development Project With Shopify CLI
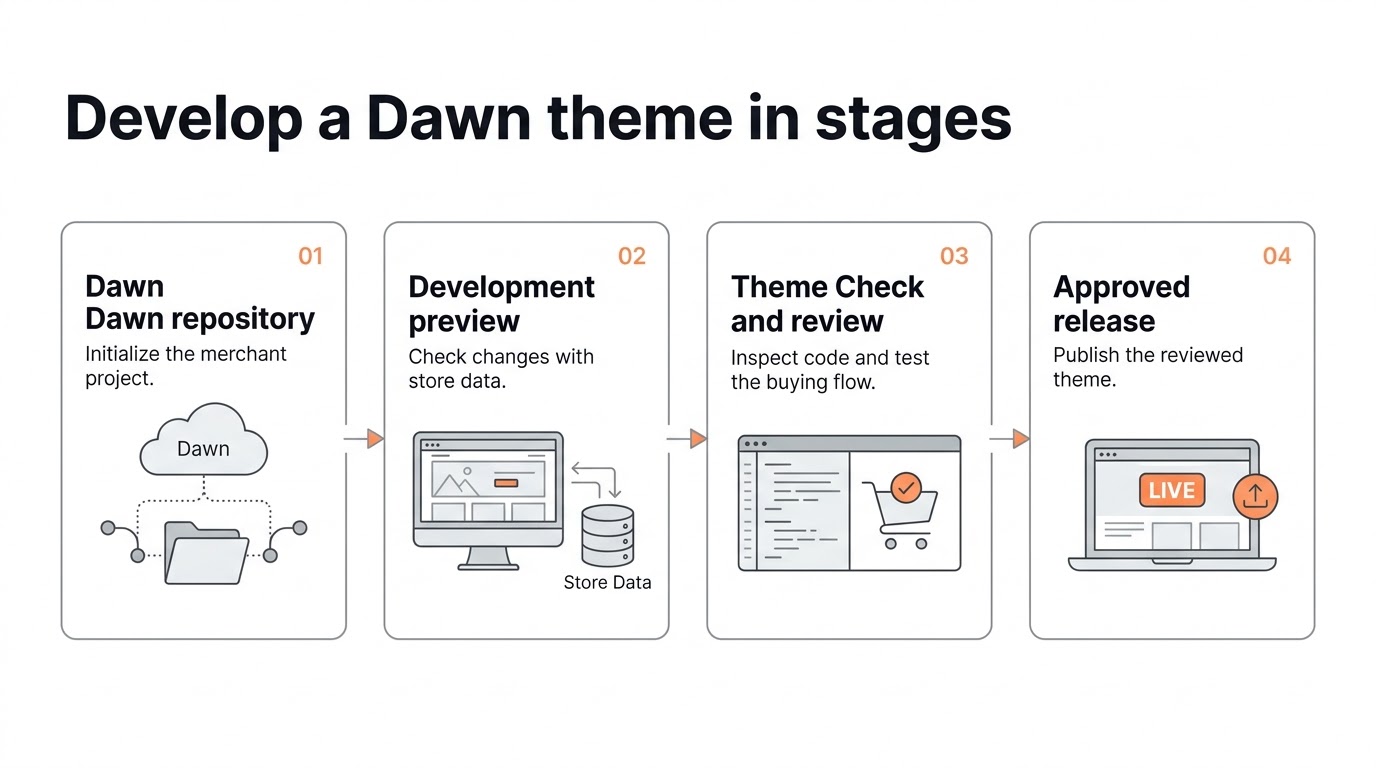
Use this workflow for a merchant’s storefront. Have an accessible Shopify store, theme permissions, Git, and a Node.js version supported by the current CLI. As checked on November 22, 2026, Shopify lists Node.js 22.12 or newer and Git 2.28 or newer. Use your own store’s myshopify.com domain wherever the commands use your-store.myshopify.com. Shopify CLI requirements
Step 1. Install and check the CLI
Run these commands in a terminal on your development computer.
node --version
git --version
npm install -g @shopify/cli@latest
shopify version
The Shopify CLI manages theme uploads and previews. Any development scripts included in the theme repository are a separate part of that repository’s workflow.
Step 2. Initialize Dawn from its GitHub repository
Create a new project directory using Dawn’s repository explicitly.
shopify theme init scalefront-dawn --clone-url https://github.com/Shopify/dawn.git
cd scalefront-dawn
git status
git remote -v
A plain shopify theme init currently defaults to Skeleton. Specifying the clone URL selects Dawn for this walkthrough. Check the resulting Git state before creating your own repository so you know whether a repository and remote already exist. Keep the theme’s license files. Theme initialization reference
If you prefer Git directly, use this route in a separate new directory instead of running the initialization above.
git clone https://github.com/Shopify/dawn.git scalefront-dawn
cd scalefront-dawn
git remote rename origin upstream
git switch -c storefront/customization
This preserves Dawn’s history and records its source as upstream. Create a private repository in your own GitHub account, add its actual URL as origin, and push your working branch when ready. Keep a baseline commit before making storefront changes. The commands here are for preparing the article’s workflow and require your own store and repository when you use them.
If you are modifying an existing merchant theme, start with its downloaded files so you keep its current settings and customizations. In a separate directory, list the store’s themes and pull the intended theme by its actual ID.
mkdir existing-store-theme
cd existing-store-theme
shopify theme list --store your-store.myshopify.com
shopify theme pull --store your-store.myshopify.com --theme THEME_ID
Replace THEME_ID before running the pull. Review and commit local changes before a later pull because it writes remote theme files into your working directory. Theme pull reference
Step 3. Start a development preview
From the theme’s directory, run the following command and complete the account authentication prompted by the CLI.
shopify theme dev --store your-store.myshopify.comOpen the preview and editor links printed in the terminal. The preview uses the connected store’s data, so check real products, variants, collections, and cart behavior as you work. Confirm that the account has permission to manage themes. Development preview reference
Step 4. Add an editable section
For a first implementation, create sections/scalefront-store-note.liquid. This adds merchant-editable text that can be placed on a homepage or product template through the Theme Editor.
{% if section.settings.heading != blank or section.settings.text != blank %}
  <div class="page-width">
    <aside
      class="sf-store-note"
      {% if section.settings.heading != blank %}
        aria-labelledby="SfStoreNote-{{ section.id }}"
      {% endif %}
    >
      {% if section.settings.heading != blank %}
        <h2 id="SfStoreNote-{{ section.id }}">
          {{ section.settings.heading | escape }}
        </h2>
      {% endif %}
      {% if section.settings.text != blank %}
        <div class="rte">{{ section.settings.text }}</div>
      {% endif %}
    </aside>
  </div>
{% endif %}

{% stylesheet %}
  .sf-store-note {
    margin-block: 2rem;
    padding: 1.5rem;
    border: 1px solid currentColor;
  }
  .sf-store-note h2 { margin: 0 0 1rem; }
  .sf-store-note .rte > :last-child { margin-bottom: 0; }
{% endstylesheet %}

{% schema %}
{
  "name": "Scalefront store note",
  "settings": [
    {
      "type": "text",
      "id": "heading",
      "label": "Heading",
      "default": "Before you order"
    },
    {
      "type": "richtext",
      "id": "text",
      "label": "Text",
      "default": "<p>Add the delivery or product information shoppers need.</p>"
    }
  ],
  "presets": [
    { "name": "Scalefront store note" }
  ]
}
{% endschema %}
In the development theme editor, use Add section → Scalefront store note. Edit both settings, try an empty heading, move the section, and check a narrow screen. If you change a product template, check other products using that template too. This is the kind of focused customization you can build while keeping Dawn’s existing product form and cart.
Step 5. Check the code and create a review theme
Stop the development server when you need the terminal again, or open another terminal in the same directory.
shopify theme check
git diff
git status
git add sections/scalefront-store-note.liquid
git commit -m "Add editable store note section"
shopify theme push --store your-store.myshopify.com --unpublished
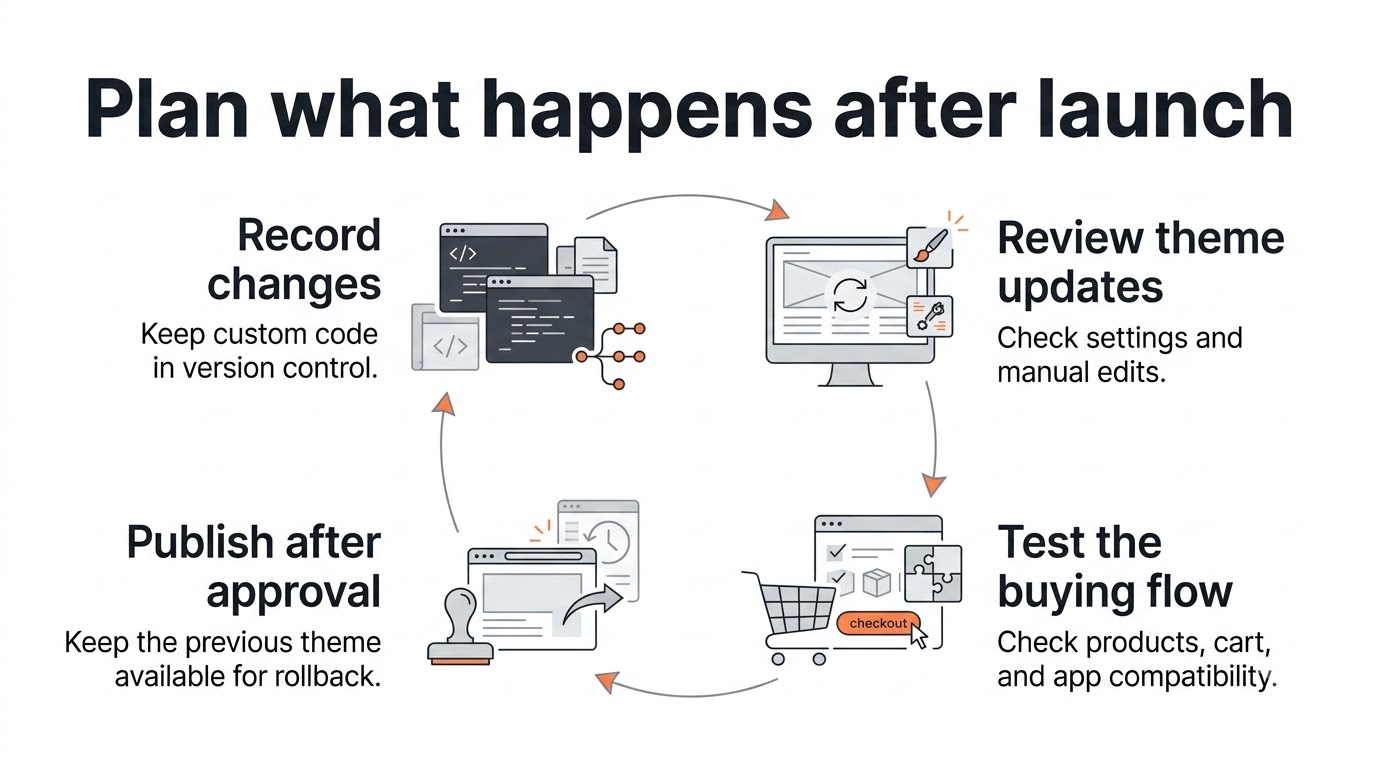
Review the uploaded theme through the links printed by the CLI. Test the settings, product selection, cart, app blocks, and mobile layout. Theme Check identifies code issues. The review still needs to cover the actual buying flow. Theme Check reference, theme push reference
Step 6. Publish the approved theme
Confirm the review theme’s ID with theme list, then publish that uploaded version after approval.
shopify theme list --store your-store.myshopify.com
shopify theme publish --store your-store.myshopify.com --theme REVIEW_THEME_ID
Replace REVIEW_THEME_ID with the actual reviewed theme ID. Publishing changes the live storefront. Keep the previous theme in the library so you can republish it if the release has a problem. Theme publishing reference
Which Shopify CLI Commands Do You Need?
| Command | What it does | When to use it |
|---|---|---|
theme init NAME --clone-url URL | Creates a local starting point from the specified Git repository | Starting a new Dawn-based merchant project |
theme list --store STORE | Lists remote themes with IDs and roles | Confirming which theme you will pull, review, or publish |
theme info | Reports the active theme environment | Checking the environment before uploading files |
theme dev --store STORE | Uploads a development theme and serves a preview | Editing locally with store data |
theme check | Runs static checks against the theme files | Before sharing a change or committing a release |
theme pull --store STORE --theme ID | Downloads the selected remote theme | Bringing merchant edits into a reviewed local working copy |
theme push --store STORE --unpublished | Uploads a new unpublished theme | Creating a review candidate |
theme push --store STORE --theme ID | Updates the selected remote theme | Updating an existing review candidate after confirming its ID |
theme open --store STORE --theme ID | Opens links for the selected remote theme | Returning to a specific review theme |
theme publish --store STORE --theme ID | Makes an uploaded theme live | Releasing the approved version |
theme package | Creates a theme ZIP | Preparing a file-based handoff |
Replace STORE, ID, NAME, and URL with project values. A push uploads local files, while a pull downloads remote files. Check the working tree and remote theme before either operation. Run shopify theme COMMAND --help to check the flags supported by your installed version. Shopify CLI theme commands
For a team workflow, keep changes in Git branches and review the diff before merging. Shopify’s GitHub integration can connect a repository branch to a theme. Coordinate that connection with CLI uploads so merchant edits and developer changes reach the same reviewed branch. Shopify GitHub integration
Shopify Theme Customization vs Custom Development: The Main Differences
| Area | Customize an existing theme | Custom theme development |
|---|---|---|
| Starting point | Existing free or paid theme | Existing codebase or minimal starter such as Skeleton |
| Design flexibility | Depends on the theme; custom code can extend it | Designed around your required layouts and components |
| Technical work | Theme Editor, Sidekick, apps, and selective code edits | Storefront planning, design, development, testing, and maintenance |
| Features | Existing theme features, apps, or selected custom features | Custom features built around requirements, sometimes with apps or backend integrations |
| Maintenance | Theme updates and compatibility checks | Developer-owned code and ongoing maintenance |
| Best fit | Stores that need standard pages or a few changes | Stores with extensive design needs or complex storefront behavior |
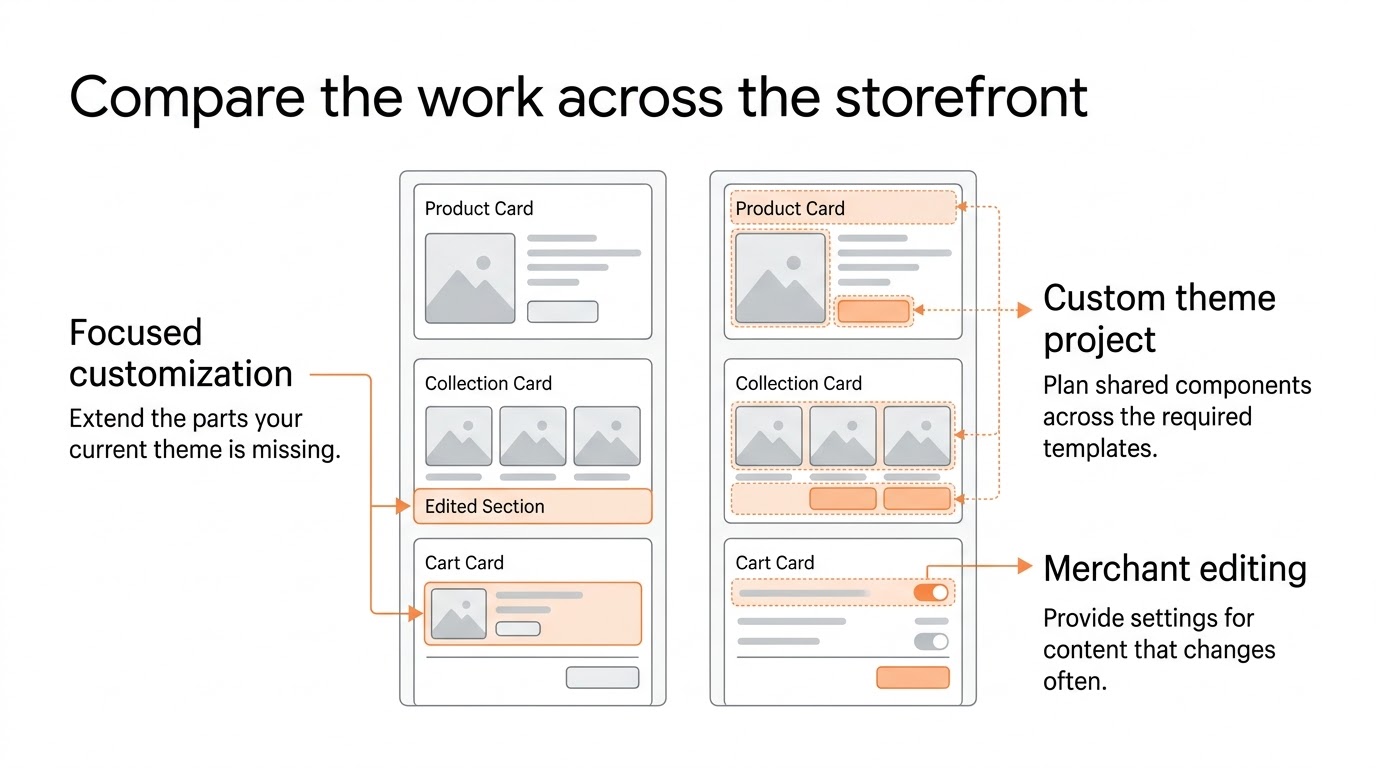
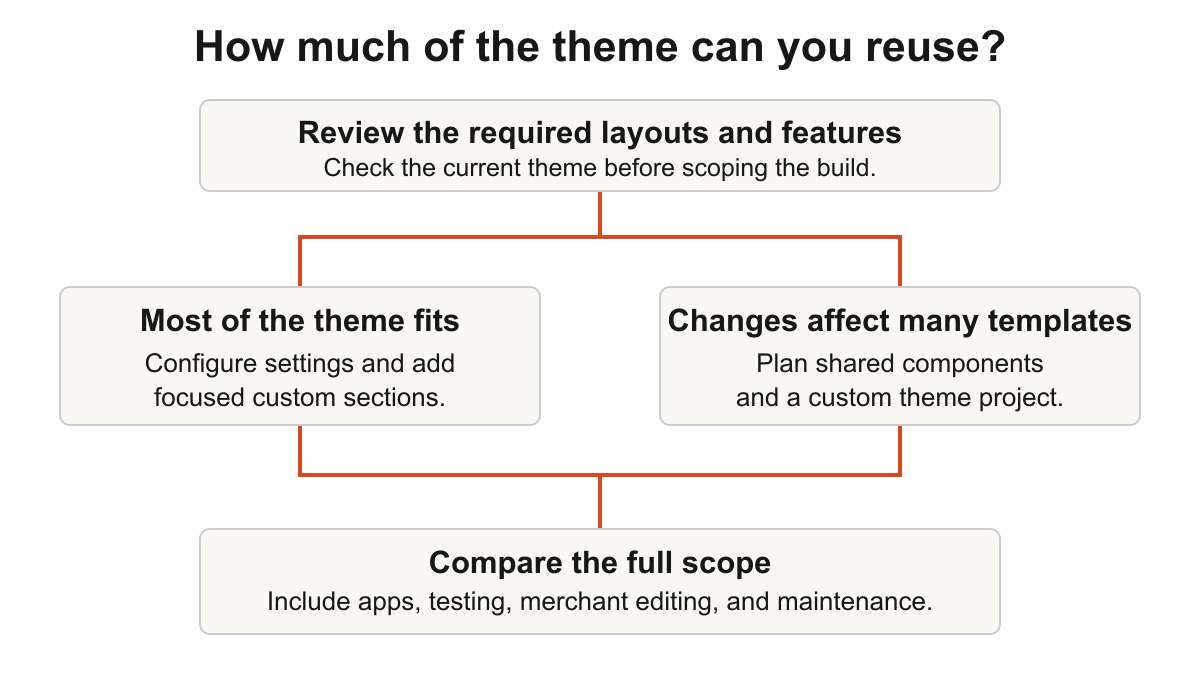
There is no fixed line between these approaches. If you heavily rewrite an existing theme, the work can become similar to custom development. The useful question is not which label sounds better. It is whether your current theme is still a good base for the store you want to build.
When Should You Customize Your Existing Shopify Theme?
You are starting a small Shopify store
If you are launching a small store with a straightforward catalog, start with a free theme such as Dawn or Horizon. Use the Theme Editor to add your branding, products, collections, and basic content.
You can use Sidekick for supported section or block changes and install apps when you need features that the theme does not provide. Product reviews, subscriptions, and bundles are good examples of features that can be added without developing a new theme.
Shopify also provides free first-party apps such as Shopify Bundles for fixed bundles and multipacks and Shopify Subscriptions for supported recurring purchase setups. Their limitations still need to be checked against your requirements.
At this stage, I would not recommend spending money on a fully custom theme unless your business model actually needs it. The priority should be launching a usable store, making sure the buying process works, and learning which changes your customers need.
You like your current theme but need a few changes
You might already have a working Shopify store and only want to improve certain areas. Maybe the product page needs a sticky Add to Cart button, the collection filters need a different layout, or the cart drawer needs clearer shipping information.
These are good candidates for theme customization. First, check whether the theme supports the change through its settings. If it does not, check whether an existing app or a small custom development task solves it.
Building a new theme for one product page feature usually adds unnecessary work.
Your required features are already available through apps
Reviews, subscriptions, bundle offers, and other common store features can often be implemented using free or paid Shopify apps. You should check the feature requirements, app compatibility, monthly cost, and what happens if you remove the app.
Do not choose a paid app just because it is easy to install. Check whether the feature is already included in your theme or available through a free Shopify app. On the other hand, writing custom code for something that a well-maintained app already handles can create unnecessary maintenance.
When an Existing App Is Worth Using
For common features, compare an app’s supported behavior with the work needed to build and maintain it. These bundle listings were checked with the local Shopify App Store search tool on November 22, 2026. The prices below are the listing’s displayed INR estimates. Shopify notes that billing uses the store’s billing currency and the exchange rate on the charge date.
| App | Displayed plan pricing | Why I would evaluate it |
|---|---|---|
| Bundler | Free plan. Premium ₹925.92/month. Executive ₹1,852.76/month | Start with its free offer types, then evaluate Premium when shoppers need mix-and-match selection |
| Kaching Bundles | Development stores free. Starter ₹1,389.34/month. Scale ₹2,779.61/month | Consider when the supplied bundle layouts fit and the plan’s additional-revenue allowance suits the store |
| Appstle Bundles | Launch free. Starter ₹740.55/month. Growth ₹1,852.76/month | Consider when its layouts and bundle-sales tiers fit your expected use |
Bundler lists volume discounts and product-page upsells on its free plan. Mix-and-match is listed on Premium. I would try the relevant plan on a theme copy before building a bundle interface just to reproduce those controls. Check discount combinations, inventory, and the resulting order with your actual catalog.
Kaching’s free installation applies to development stores in the captured plan details. Starter lists up to $1,000 in additional revenue and Scale up to $5,000. Review how the app measures that revenue before comparing its subscription with custom work. A layout that already meets your needs can save the development work for the widget, but you still need to test its fit with the theme.
Appstle’s Launch plan lists up to $750 per month in bundle sales. Starter lists up to $2,000 and Growth up to $5,000. Check that limit against how much bundle revenue the store expects. If the supplied selection rules work, using the app lets the team configure the offer and test fulfillment before deciding whether custom rules are needed.
For fixed bundles and multipacks, also check Shopify Bundles first. If you need customer-selected components, product personalization, or an ERP handoff, map those requirements before choosing the app. Our product configurator guide and custom app comparison cover those decisions.
When Should You Choose Custom Shopify Theme Development?
Your store needs a very different UI
If your business already has a detailed design in Figma and you want your Shopify store to match it closely, a ready-made theme might not be flexible enough.
You can modify an existing theme, but if nearly every section, product page, and collection page needs to be rewritten, it may be easier to build a custom theme with reusable components from the beginning.
This is also a reason to plan the design system first. It reduces the chance of different pages ending up with inconsistent buttons, spacing, and typography.
You have custom features across several pages
One custom section is usually not a reason to rebuild. But if your product pages, collections, search experience, and cart all need custom interactions, the existing theme can start getting difficult to manage.
Consider a store selling configurable furniture. The product page may need material and size selection, an updated price, product-specific information, and a cart that carries those selections correctly. Some parts belong in the theme; others may need apps or integrations.
A custom development project gives you room to plan these pieces together rather than adding separate fixes every time a new requirement appears.
Your monthly app fees are increasing
This is another situation worth reviewing, especially for growing Shopify stores. It is common for a store to install different apps over time: one for a cart drawer, another for sticky Add to Cart, another for a shipping progress bar, and more for product options or upsells.
Not all these apps are unnecessary. But if several paid apps provide small overlapping frontend features, you may be paying repeatedly for things that could be developed directly into the theme.
Before replacing them, make an app audit. Check what each app does, whether customers actually use the feature, what it costs over a year, and whether it needs backend services. Compare that with the cost of developing and maintaining an alternative.
Custom development is not automatically cheaper than apps. A custom feature has an initial development cost and may need updates as Shopify changes. For some features, keeping a reliable app will still be the better choice.
Your existing theme is becoming hard to maintain
An existing theme can become difficult to work with after many direct code edits, scripts, and app integrations. Developers may have to understand previous customizations before they can make even a small change.
In that situation, a planned rebuild can help organize the code, remove features that are no longer used, and create reusable sections. But a rebuild is not automatically a performance improvement. The new theme still needs to be tested for loading speed, mobile usability, accessibility, and compatibility with the apps you need.
Performance, SEO, and Maintenance
A custom theme is not automatically faster than Dawn or Horizon. A well-maintained existing theme can perform better than a custom theme with too much JavaScript, oversized images, or poorly written Liquid.
The same applies to SEO. Both approaches can support product metadata, structured content, internal links, responsive images, and sensible page layouts. A new theme does not improve rankings simply because it was custom-built.
Maintenance also needs attention. Shopify's theme update process can carry many Theme Editor changes into an updated theme, but manual code edits are not always carried over. Developers should review changes and test the updated copy before publishing it.
With a custom theme, your development team takes more responsibility for future Shopify changes, bug fixes, and new features. That responsibility should be included when estimating the project, not ignored after launch.
For layout implementation, see our Figma-to-Shopify guide. For loading problems, use our Shopify speed guide.
Read Shopify's theme update guidance for the difference between editor settings and manual code changes.
How Much Does Each Approach Cost?
There is no single price for Shopify theme customization or custom theme development. The cost depends on the design, features, number of page templates, integrations, and how much existing code can be reused.
A few changes through the Theme Editor may not need a developer at all. A custom product page, new cart flow, or complex variant selector requires more work. A full theme project also includes design planning, testing, and ongoing support.
The most useful comparison is the total cost of owning the storefront, not just the first invoice. Include paid apps, developer work, future changes, bug fixes, and the cost of maintaining custom features.
I would avoid choosing a custom build only to save a small monthly app fee. The decision makes more sense when you need better control, several related custom features, or a storefront structure that the current theme cannot support well.
Shopify Theme Cost and Delivery Ranges
Use these planning ranges to compare the work involved. The written proposal confirms the templates, features, review rounds, price, and delivery schedule.
| Scope | Focused Theme Customization | Custom Sections and Templates | Custom Shopify Theme |
|---|---|---|---|
| Starting point | Your existing Shopify theme | Existing theme with new reusable components | Agreed design system and storefront requirements |
| Included work | Branding, layout adjustments, and agreed product or cart improvements | New editable Liquid sections and changes across agreed templates | Design system, custom templates, storefront interactions, testing, and handover |
| Template allowance | Changes across up to 3 existing templates | Up to 5 agreed templates with scoped custom sections | Up to 7 agreed templates with reusable sections |
| Review rounds | 2 | 3 | 4 |
| Delivery range | 7–10 working days | 14–21 working days | 28–42 working days |
| Planning price | ₹30,000–₹50,000 | ₹50,000–₹80,000 | ₹1,20,000–₹1,50,000 |
A template is a reusable layout, such as a product or collection page. Confirm the number of unique sections and their behavior alongside the template count. A complex product configurator, subscription flow, or external integration needs its own scope even when it appears on a single template.
The schedule starts once access, content, and design inputs are available and the scope is agreed. Allow separately for merchant feedback and any new requirements added during review. A conversion experiment needs its own measurement window after implementation.
Budget separately for theme licenses, paid apps, external services, taxes, and ongoing maintenance unless the proposal includes them. Agree post-launch support and recurring maintenance around the actual features being maintained. Discuss theme development with Scalefront
How to Choose the Right Approach for Your Store
Start by looking at your current requirements, not the size of your business alone.
Choose an existing Shopify theme and customize it when the design is close to what you need, most changes are available in the Theme Editor, and any missing features can be handled by a few reliable apps or small code changes.
Choose custom Shopify theme development when your UI needs to be designed around a specific buying journey, many sections require different behavior, or your current theme would need major changes across the store.
If your main concern is growing app costs, review those apps first. A small custom feature may solve the problem without replacing the whole theme. If the store needs a larger redesign at the same time, a custom build may be worth considering.
You can also take a middle approach: keep your current theme and develop only the parts that need custom work. For many stores, this is the more sensible decision.
Final Recommendation
For a new or small Shopify store, I recommend starting with a free or paid theme that already meets most of your needs. Use the Theme Editor, Sidekick where it is useful, and Shopify apps for common features. There is no reason to build a custom theme just to make a basic store look different.
For a growing store with a specific design, several custom features, or a theme that has become difficult to maintain, custom development is worth evaluating. But even then, do not rebuild everything without checking what can be reused.
The goal is not to have a custom theme. The goal is to have a Shopify store that works for your business and is easy to improve later.
If you need help deciding, a Shopify theme audit can identify which changes are possible in your current theme, which features are better handled by apps, and which parts actually need custom development. At Scalefront, this is the approach we recommend before committing to a rebuild.
Sources and Technical References
- Shopify Help Center — Customizing themes
- Shopify Help Center — Theme Editor
- Shopify Help Center — Generate theme blocks with Sidekick
- Shopify Help Center — Canvas (early access)
- Shopify Developers — Create a theme
- Shopify Developers — Theme Store requirements
- Shopify Help Center — Updating themes
- Shopify Help Center — Shopify Bundles
- Shopify Help Center — Shopify Subscriptions
Frequently Asked Questions
Scalefront Team
The ScaleFront engineering team designs and builds bespoke Shopify themes, apps, and headless architectures for scaling DTC brands.
Speak with an architect →Need Custom Shopify Architecture?
We engineer bespoke Shopify themes, private apps, and headless storefronts designed for speed and conversion.
Related Articles
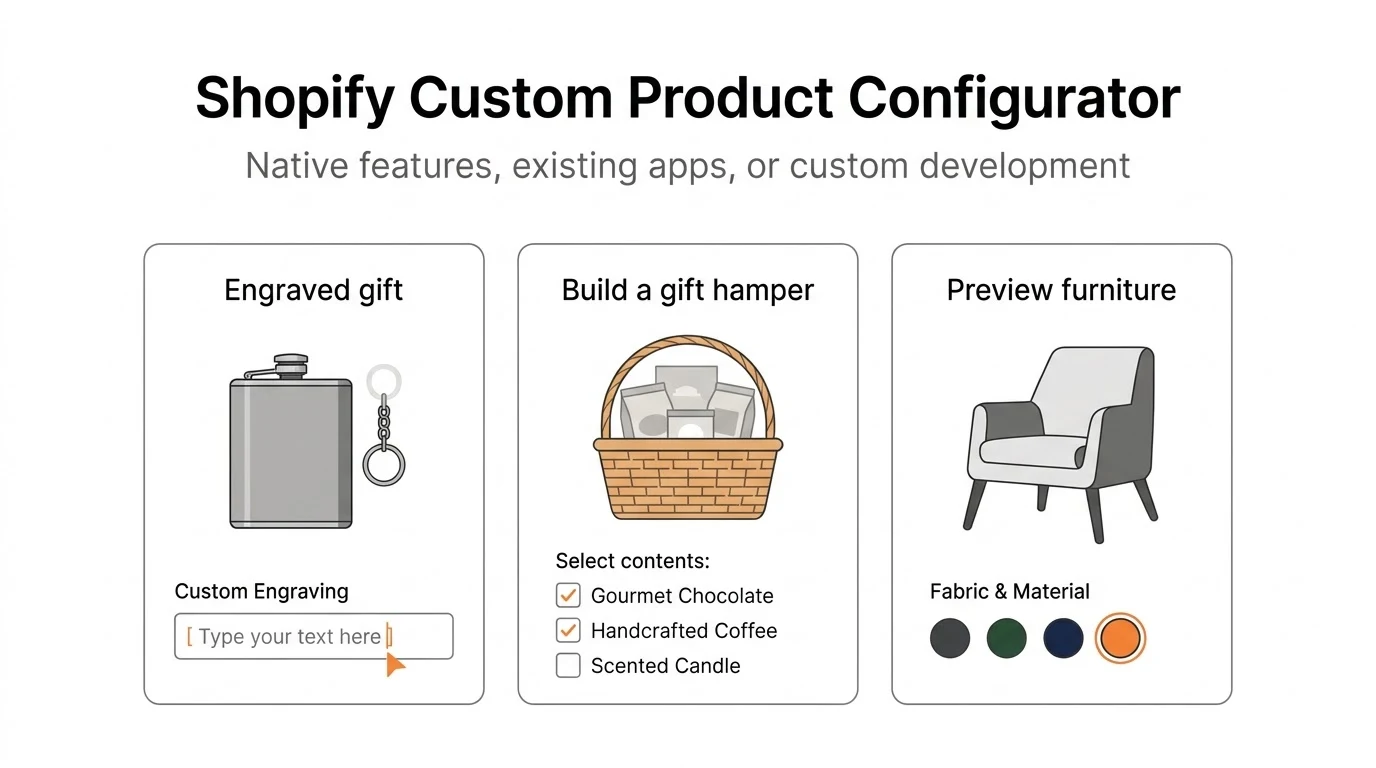
Shopify Custom Product Configurator: Apps vs Custom Development
Learn how to build a Shopify product configurator using native features, product option apps, or custom development. Covers variants, engraving, bundles, 3D previews, and pricing.

10 Best Shopify Subscription Apps for 2026 Compared
Real comparison of top Shopify subscription apps. Appstle vs Recharge vs Loop - pricing, features, support. Find the best app for your subscription business.

Build a High-Converting Furniture Shopify Store (2026)
Learn how to create a furniture ecommerce store on Shopify with AR visualization, 360° views, and room planning tools. Reduce returns by 40% and increase conversions.